Check valves play a vital role in pump systems, ensuring water flows in the correct direction and preventing backflow that could damage equipment or disrupt operations. Correct installation is essential not only for system efficiency but also for the long-term protection of pumps and pipelines.
In this article, we’ll explore two common installation positions for check valves and the reasoning behind each, along with a recommended installation sequence.
1. Purpose of Installing a Check Valve
A check valve allows fluid to flow in only one direction and automatically closes to prevent reverse flow when the pump stops. The key purposes include:
Preventing backflow into the pump or water source.
Maintaining prime in systems where pumps are installed above the liquid level.
Protecting pumps and pipelines from sudden pressure surges.
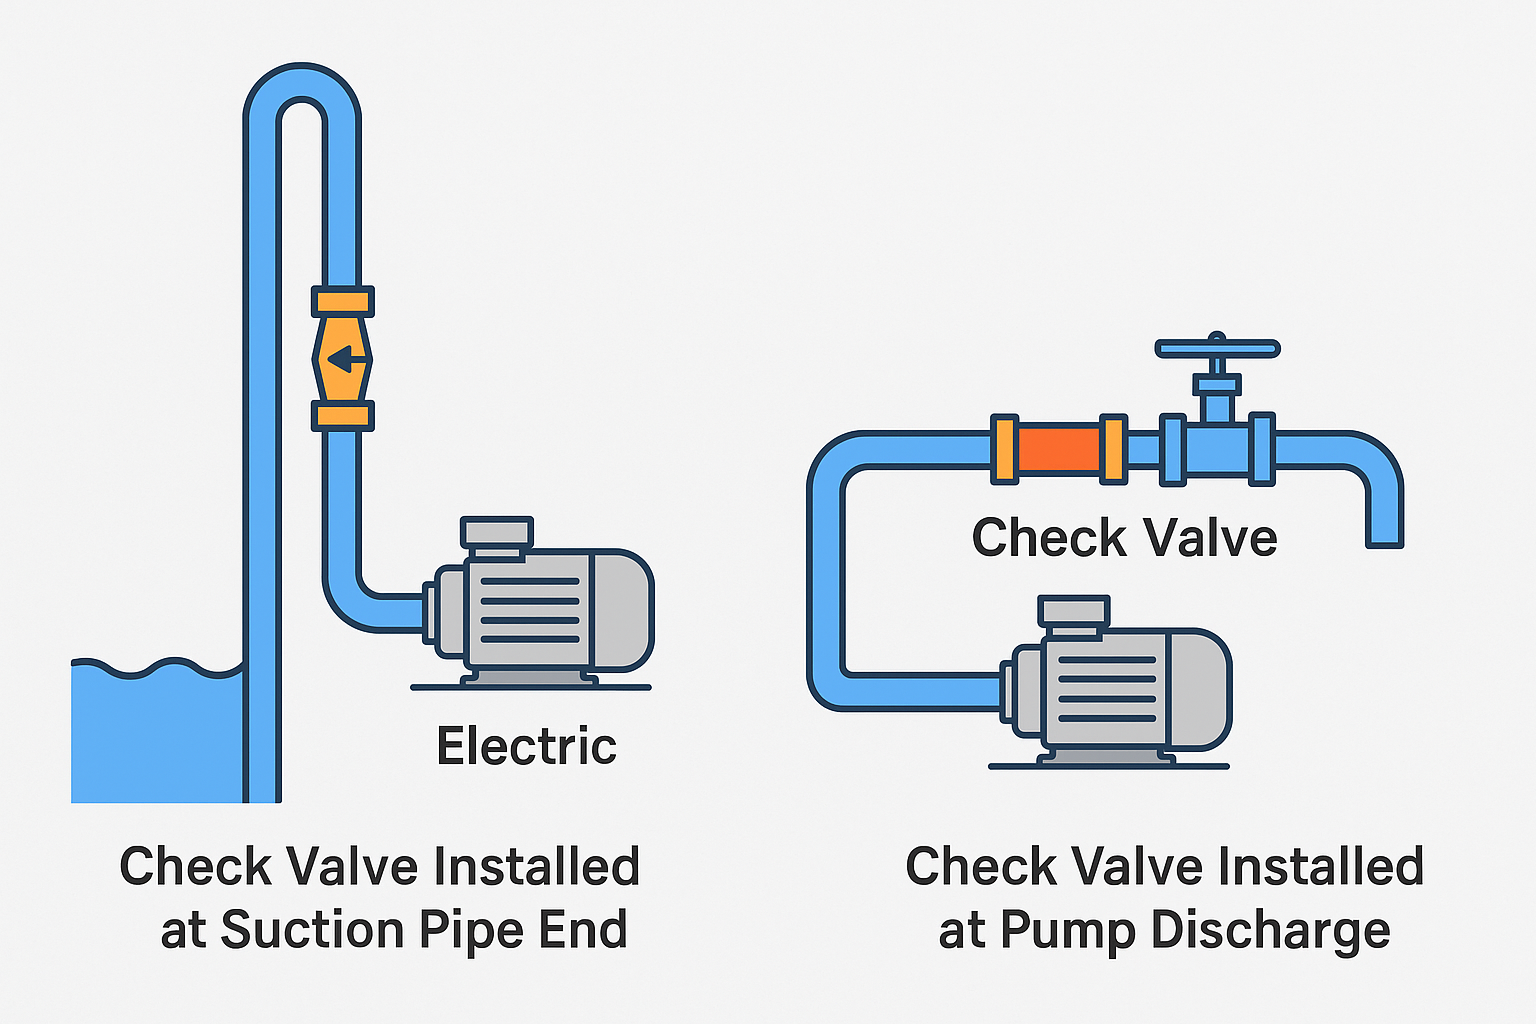
2. Two Common Check Valve Installation Positions
(1) Check Valve at the Suction Pipe End (Foot Valve)
Application Scenario: When the pump is installed above the liquid level (negative pressure suction).
Function: Keeps the pump casing and suction pipe filled with water, avoiding the need for manual priming each time the pump starts.
Operation Principle: The foot valve closes when the pump stops, preventing water in the suction line from draining back into the source.
Typical Use: Deep well pumps, river water intake systems, and tanks with pumps located at higher elevations.
(2) Check Valve at the Pump Discharge
Application Scenario: When the liquid level is above the pump (positive pressure suction).
Function:
Prevents water from flowing back into the pump when it stops.
Allows pump start/stop without repeatedly opening or closing the discharge valve.
Special Advantage in Multi-Pump Systems: Avoids reverse flow between pumps sharing the same main pipeline.
Typical Use: Municipal water supply booster systems, industrial process pump stations, and fire pump systems.
3. Recommended Installation Sequence
To ensure ease of maintenance and reliable operation, check valves should be installed before the discharge isolation valve but after the flexible connection.
A standard sequence is:
Flexible Connector – Absorbs vibrations and compensates for minor misalignments.
Check Valve – Prevents backflow.
Isolation Valve (e.g., butterfly valve, gate valve, globe valve) – Used for system shutdown and maintenance.
4. Visual Reference
The diagrams below illustrate the two installation configurations:
Foot Valve on the Suction Side – For pumps above the liquid level.
Check Valve on the Discharge Side – For pumps below or level with the liquid source.
5. Conclusion
The correct installation of a check valve depends on the pump’s operating conditions and the system layout.
Suction side foot valves are essential for negative pressure suction systems.
Discharge side check valves are best for positive pressure systems or multiple pump arrangements.
Following the correct installation position and sequence will reduce downtime, extend pump life, and maintain system reliability.