Brief Data:
Indication accuracy: A type 30/100 standard test piece artificial groove is clear.
Communication storage: None
Standby time: long time continuous work: magnetization time is less than 3 seconds, gap time is more than 5 seconds.
Host weight: about 7 kg
Weight of whole machine: 8.5Kg
Outline size: 130mm * 265mm * 200mm
Related standards: JB/T8290 – 1998
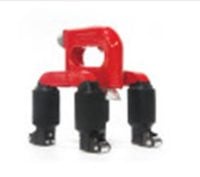
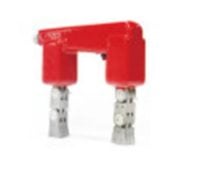
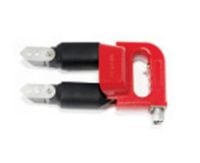
Product overview:Multifunctional magnetic particle flaw detector is a new type of magnetic particle flaw detector designed and produced by our company Dalian Zero Instrument Technology Co., Ltd, which absorbs the advantages of similar products at home and abroad. It is small in size, light in weight and easy to operate, and integrates many functions of similar products in one body. The instrument can be equipped with four kinds of probes A, D, E and O. It can realize four kinds of detection functions: magnetic clamp type, electromagnetic yoke type, cross yoke type and ring type. It is a necessary professional precision instrument for defect detection, quality control, in-service safety monitoring and life evaluation in the fields of petroleum, chemical industry, metallurgy, shipbuilding, aviation and railway.
Measurement range: ≥45N (lifting force not less than 5 kg)
Functional use:Aircraft manufacturing, boiler and pressure vessel, electric power, oil field, shipbuilding, steam turbine and internal combustion engine parts, coal mine, machinery, standard parts, oil pump nozzle, automobile parts, bridge building, chemical industry, railway, large-scale mechanical parts, steel structure equipment and other industrial products; surface and proximity caused by forging, quenching, welding, fatigue, etc. Surface defects, such as chain rods, crankshafts, bearings, high strength bolts, springs, forgings, petrochemical pipe fittings, valves, blades, gears, anchor chains and welds and other geometrically complex workpieces.
Working principle:If there are defects (cracks, folds, inclusions, etc.) on the surface or near the surface of the object, magnetic flux leakage will occur in the vicinity of these defects, when magnetic particles with good magnetic conductivity (usually magnetic iron oxide powder) are applied to the object. When the magnetic flux leakage near the defect absorbs the magnetic particles and forms visible magnetic particle traces, forming visible magnetic marks under the appropriate light, thus showing the position, size, shape and severity of continuity, and showing the defect.
Working conditions:
Ambient temperature: operating temperature – 10 ~ + 40 C
Storage temperature: -20 C ~ + 70 C
Relative humidity: less than 80%
The surrounding environment has no strong vibration, no strong magnetic field, no corrosive medium and serious dust.
Characteristic of instrument:According to the magnetic interaction between magnetic flux leakage and magnetic powder, the shape, position, size and severity of defects can be visually displayed, and the properties of defects can be determined.
Applying the new power supply mode, the product has been improved not only in the depth of defect detection but also in the sensitivity of surface detection.
Adjustable magnetic yoke spacing, enlarging instrument practicability
The utility model has the function of electricity lighting, and is convenient to use in the condition of insufficient light.
It is equipped with four different optional magnetic probe devices, which enhances the adaptability and accuracy of measuring different shape workpieces.
Using a variety of magnetization methods, almost unlimited by the size and geometry of parts, can pick up and measure parts of the workpiece.
Using SCR as magnetizing switch and ergonomic design, it is convenient for the detector to control the magnetizing switch at any time while holding the probe in hand.
The inspection and detection speed is fast, the process is simple and the cost is low.
It can detect defects beneath the surface of 0.5-3 mm workpiece. For larger pores, the detection depth of DC magnetization can reach 5 mm.
With high detection sensitivity, the magnetic mark formed by magnetic powder aggregation on the defect can be amplified, and the minimum width can be detected up to 0.1 micron.
Operation methods and matters needing attention:Instrument operation
Instrument connection
(1) Insert the cable plug into the “output interface” socket of the instrument. There are small grooves inside the cable plug, and insert the instrument socket tightly in the direction of the groove.
Then the knob on the cable plug is tightened to ensure that the cable is tightly connected with the plug. The other end of the output cable is inserted into the interface of the electromagnetic yoke probe and the knob is tightened.
2.2 instrument boot
- Insert the flat plug of the power cord into the “power input” socket of the instrument tail plate.
The other end of the wire is inserted into the 220V socket of the power distribution panel.
(3) Press “-” to turn on, at this time the host front red power indicator lights up, and the electromagnetic yoke handle of the working lights will be on, the instrument into the ready measurement mode (at this time, the green magnetization indicator lights are not on).
Start a wound
The probe has good contact with the surface of the workpiece.
(2) By pressing the button switch on the handle of the probe, the workpiece can be magnetized and the green magnetization indicator lights up.
Release the button on the handle to stop the flaw detection.
Matters needing attention
In order to achieve the desired effect of flaw detection, before the formal operation, the sensitivity of flaw detection should be checked first. The 30/100A standard test strip can be placed on the surface of the workpiece under investigation, and the test strip can be bonded around it with adhesive tape, and the standard test strip can be placed in the center of the probe, sprayed with magnetic suspension, and then electromagnetic. The artificial groove on the test strip should be clearly displayed. Clarity and integrity indicate that the sensitivity of detection and the preparation of magnetic suspension meet the requirements.
The working rhythm of the instrument suggests that the magnetization time should be less than 3 seconds and the interval time should be more than 5 seconds.
Before using the instrument, check whether the power supply voltage meets the requirements of the instrument, such as too high or too low will damage the instrument or affect the effect of flaw detection.
When using, the end face of the probe should keep good contact with the detected workpiece, and then press the magnetizing switch, at this time the magnetization effect is the best.
The instrument has a good no-load over-current protection circuit, but in use, should try to avoid no-load work to reduce unnecessary temperature rise.
The instrument can work continuously, if any part of the fever is found to be serious, stop using it.
Instruments and accessories should be used or stored in a clean, dry and non corrosive environment.
Please pay attention to the high pressure inside the machine when you repair it yourself.
Do not switch power or plug cable when pressing the magnetizing working switch.
The enclosure of the instrument must be grounded reliably.
If the circuit fault is unable to repair, please send the instrument back to our service center.
Maintenance and maintenance of instruments:The multifunctional magnetic particle flaw detector is a precision testing instrument. Attention should be paid to the following items in application.
Try to avoid pulling and plugging the instrument in the boot state.
After the instrument is used, clean cotton yarn is used to wipe the grease dirt and prevent the rain water and oil from seeping into the interior.
In moving, we should avoid strong vibration. We should store them in dry and ventilated places at ordinary times.
When the instrument is not used for a long time, it should be energized every three months to avoid dampness of the components, affecting the performance of the instrument.
Turn off the machine for 5 seconds before you can switch on again.
Before pressing the probe switch, the end face of the magnetic pole head of the movable joint should keep in good contact with the workpiece as far as possible; before the probe leaves the workpiece, the switch should be loosened in time; and the movable joint should be lubricated and rusted regularly.
Turn on the power switch, the power indicator is not on, it may be “power input” on the fuse damage or indicator damage.
If the magnetizing indicator is not on, it may be that the indicator bulb is damaged or the relay inside the instrument is finally sucked in, or the bidirectional thyristor is damaged, which can be checked and eliminated separately.


