1. Introduction
In petrochemical plants, rotating machinery such as compressors and large process pumps play a vital role in stable and continuous production. These machines often operate under high temperature, high pressure, and hazardous conditions, demanding rigorous control and monitoring. Shaft instrumentation systems provide critical data on key parameters such as shaft vibration, axial displacement, bearing temperature, eccentricity, and rotational speed, enabling early diagnosis of mechanical faults such as misalignment, imbalance, or bearing wear.
2. Applications of Shaft Monitoring Instruments
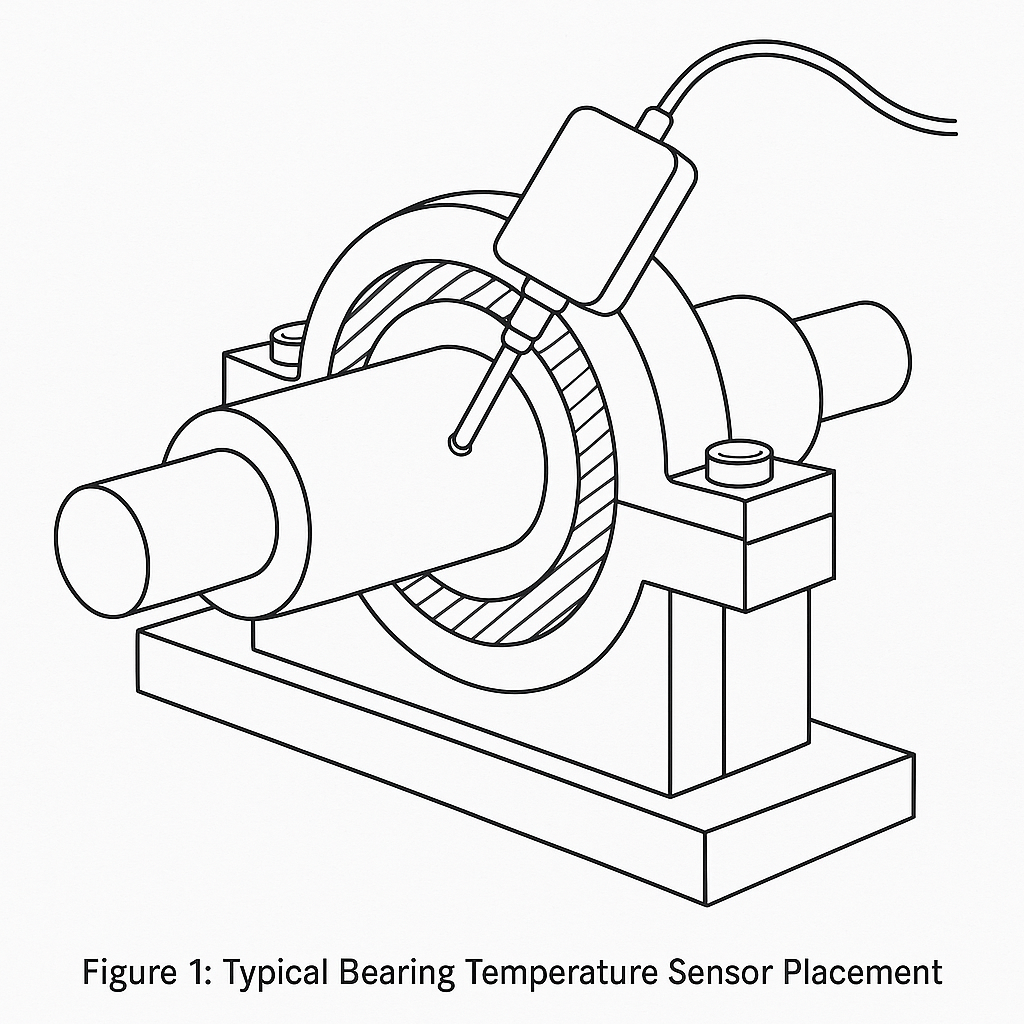
2.1 Bearing Temperature Measurement
Bearing temperature monitoring typically covers both radial and thrust bearings. Sensors such as Pt100 RTDs (Resistance Temperature Detectors) or T-type thermocouples are embedded in the active bearing pads, ideally positioned perpendicular to the shaft’s rotation axis.
Installation Notes:
Sensors must be fully inserted into pre-machined temperature holes.
Cables should be routed through designated grooves and fixed securely.
Collaboration between mechanical and instrumentation teams is essential to avoid damaging the sensor wires during bearing assembly.
2.2 Vibration Monitoring
Vibration sensors fall into two categories:
Contact sensors: Velocity or acceleration sensors mounted on the machine casing.
Non-contact sensors: Primarily eddy current proximity probes, used for real-time monitoring of shaft vibration.
2.3 Displacement Measurement
Displacement monitoring involves tracking relative movements such as:
Axial displacement of compressor/turbine rotors.
Eccentricity during start-up/shutdown.
Thermal expansion difference between rotor and casing.
Piston rod drop in reciprocating compressors.
Eddy current proximity sensors are commonly used, differing from vibration sensors mainly in range and sensitivity.
2.4 Keyphasor and Rotational Speed Measurement
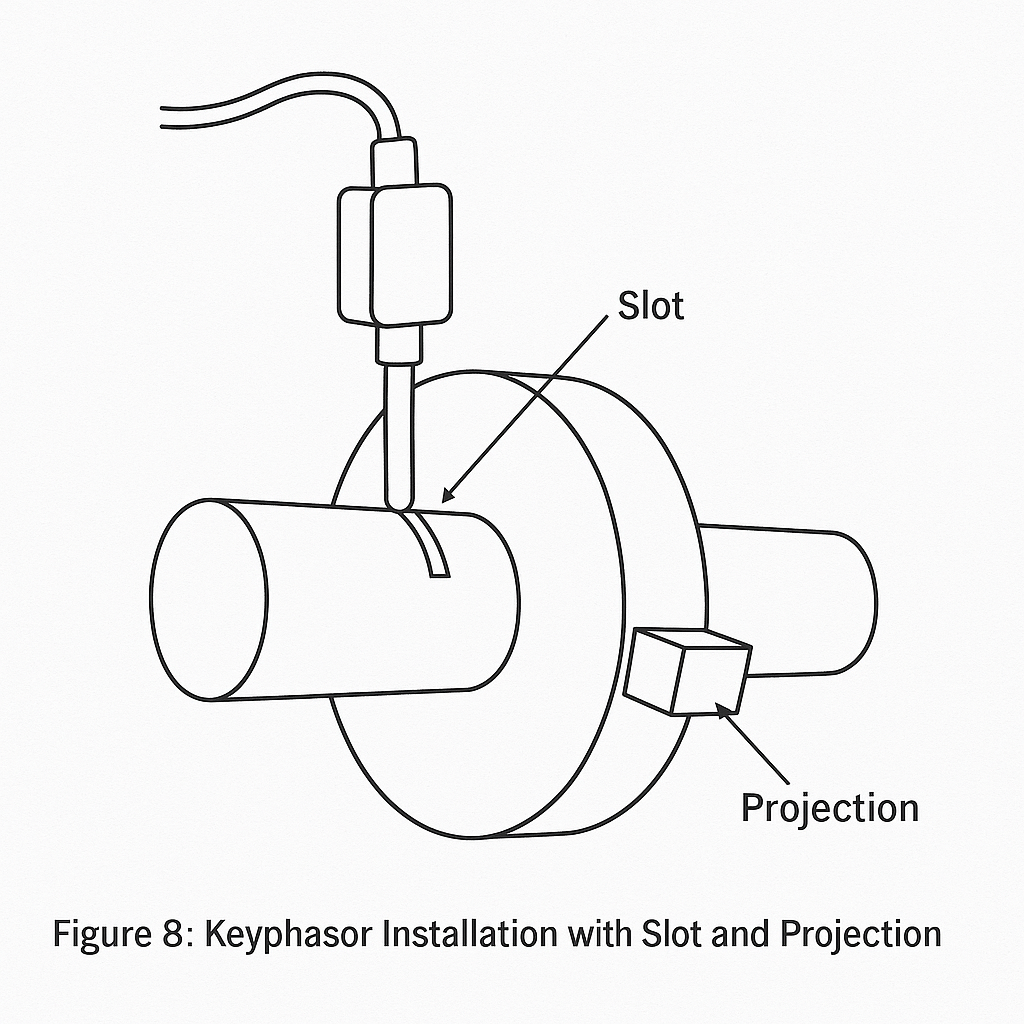
Keyphasor sensors detect once-per-turn shaft position signals, using slots or protrusions on the shaft. These signals are vital for:
Shaft speed measurement.
Phase analysis of vibrations.
Common sensor types:
Eddy current probes
Passive magnetic pickup sensors
Active magnetic sensors (PNP/NPN outputs)

3. Eddy Current Proximity Probe System
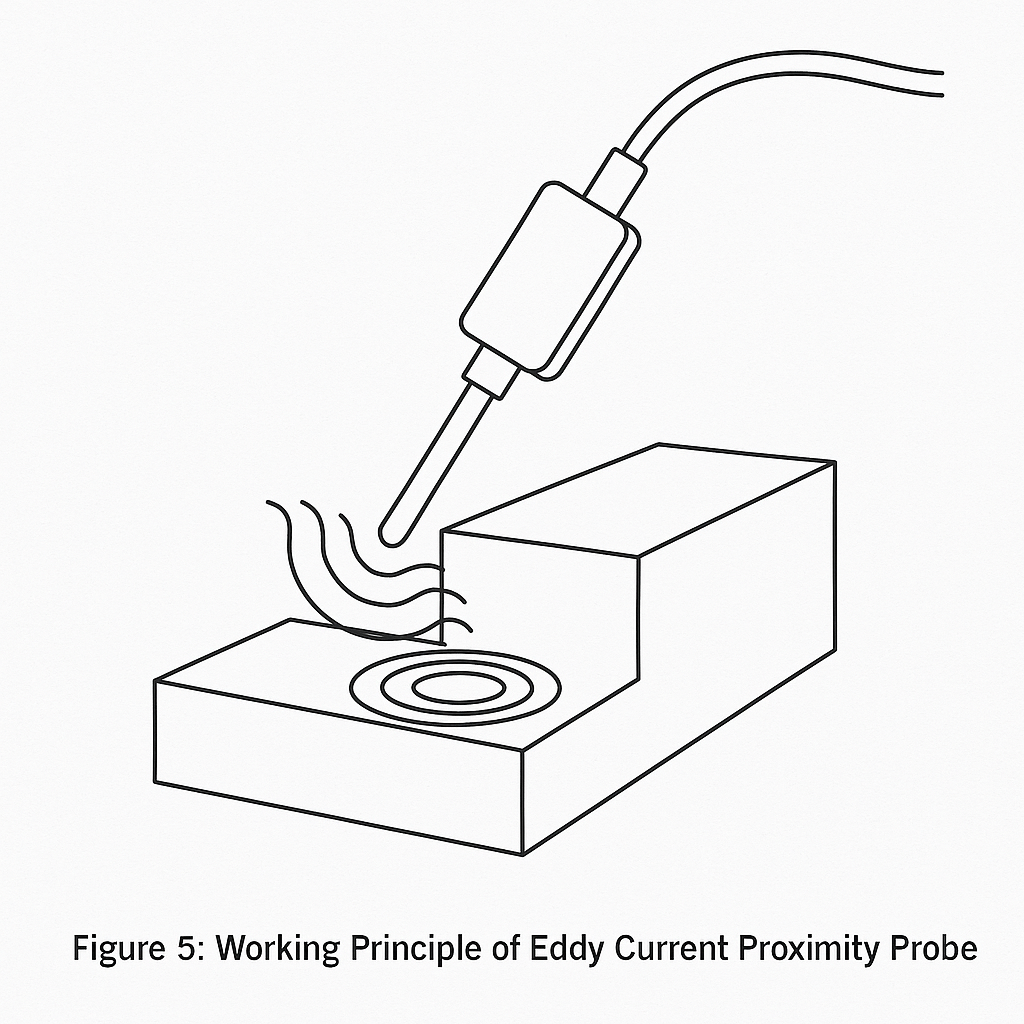
Eddy current probes operate based on Faraday’s law of induction. An alternating magnetic field induces eddy currents in a nearby metal surface, altering the impedance of the coil. This impedance change correlates to the distance between the probe and the target, providing precise displacement or vibration measurements.
3.1 Probe System Components (e.g., Bently Nevada Series)
3300 XL 8 mm system: Standard, 2 mm linear range, 7.87 V/mm sensitivity.
3300 XL 11 mm system: Extended range up to 4.5 mm, 3.94 V/mm sensitivity.
High-temp and DE (Differential Expansion) models: Suitable for environments up to 350°C.
3.2 Static Calibration Procedure
Using a micrometer test stand (e.g., TK-3), increment probe gap and record voltage output to verify:
Linear response within expected sensitivity range.
Midpoint installation voltage (~9 VDC for 8 mm probes).
3.3 Dynamic Calibration
Simulate vibration signals using a dynamic tester, verify probe output at 3-5 key amplitude points, and compare with monitor readings.

4. Probe Installation Guidelines
Pre-Installation:
Ensure boreholes are clean and burr-free.
Use electrical measurement (voltage method) for gap setup.
Probe & Cable Routing:
Secure connections between probe and extension cable.
Avoid tight bends (min. bend radius > 55 mm).
Pre-amplifier Mounting:
Place away from heat, moisture, and vibration sources.
Avoid direct contact with chassis ground.
Speed/Keyphasor Installation:
Use feeler gauges to set gap (typically 1.3–2.0 mm).
Align with shaft slot (for slots) or raised key (for projections).
Axial Displacement Probe Setup:
With shaft at mid-thrust position, adjust probe for zero reference voltage.
Validate zero offset and full travel against mechanical dial indicators.

5. Common Faults and Troubleshooting
| Symptom | Possible Cause | Action |
|---|---|---|
| No signal or unstable output | Probe damaged or loose | Replace probe, secure connections |
| Signal drift or noise | Poor grounding or shielding | Recheck cable routing and grounding |
| Voltage mismatch | Incorrect gap setting | Re-adjust probe gap to mid-linear range |
Conclusion: Accurate shaft instrumentation is essential for predictive maintenance and safety of rotating machinery. Proper installation, calibration, and fault handling significantly extend equipment life and minimize downtime.
For further technical support or sensor selection assistance, contact the Zero Instrument technical team.
