A proper visual inspection of a bimetallic thermometer is a fundamental step to ensure its reliable performance. From the dial to the sensing element, thorough checking of visual features helps detect potential issues before they affect accuracy. This guide outlines key inspection steps, critical points to assess, and common defects to watch for.
1. Dial and Display Inspection
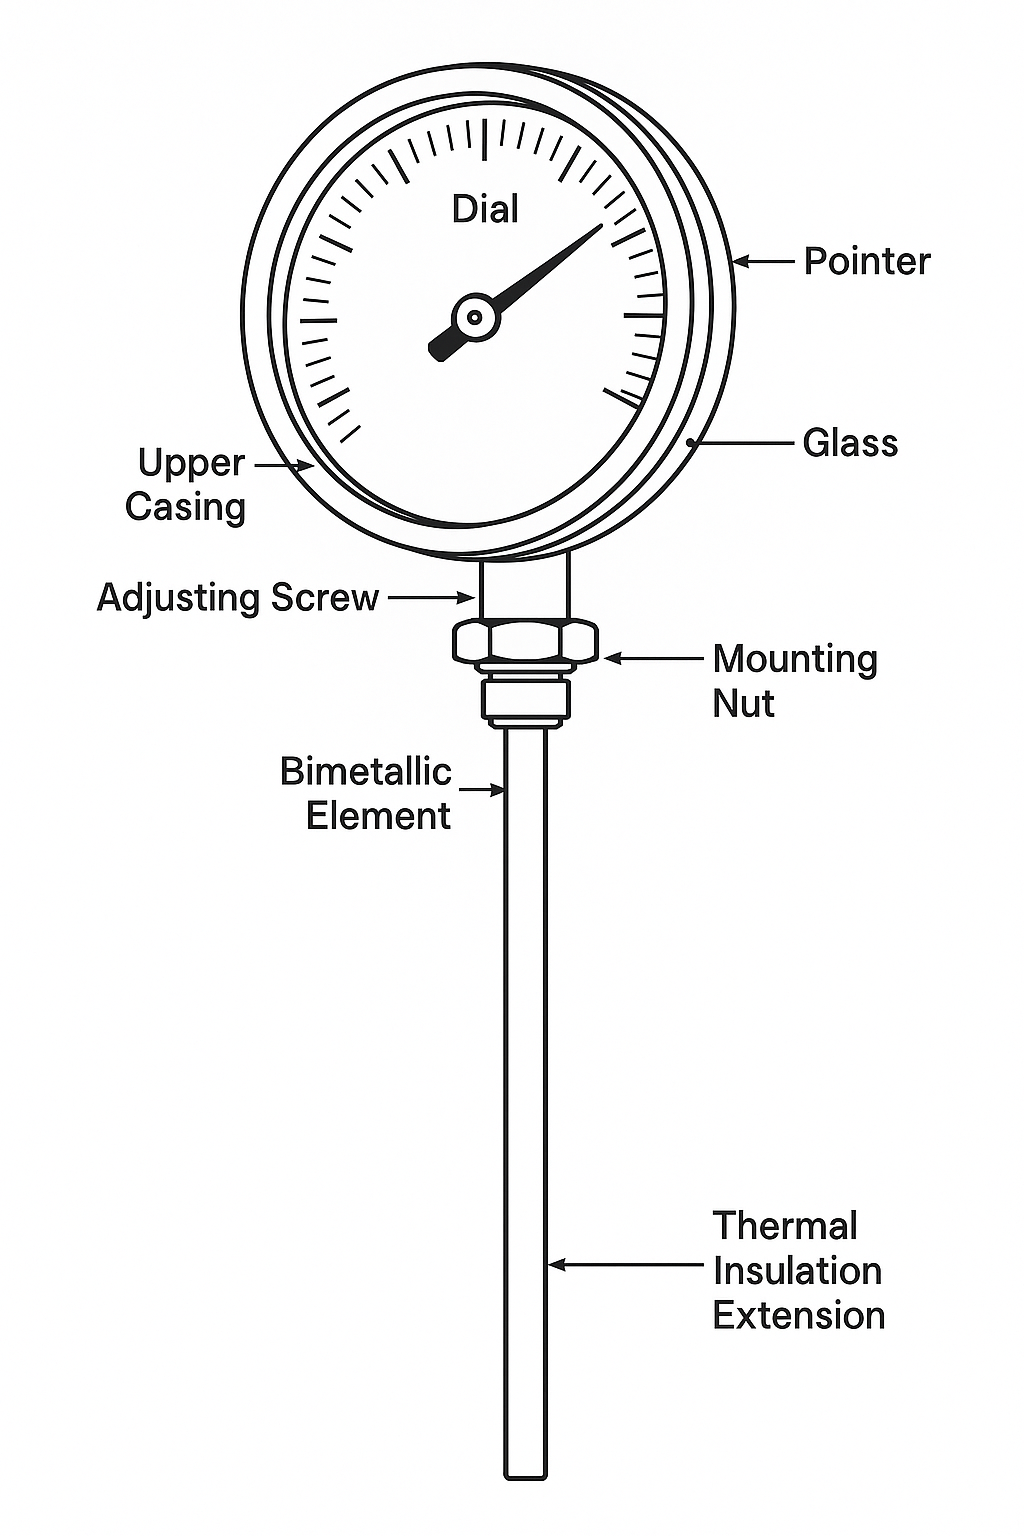
Dial Integrity:
Check if the dial surface is flat, free of scratches, stains, or deformation. Scale markings must be clear and evenly spaced. All numerical and unit indicators should be legible and consistent with the product documentation.
Pointer Condition:
Ensure the pointer is straight, free from bending or twisting. It should not rub against the dial and must maintain a consistent gap. At rest, the pointer must align accurately with the zero or starting mark.
Glass Cover:
The glass should be transparent and clean, with no air bubbles, cracks, or damage. It must be firmly sealed to the dial housing with no gaps or looseness that may allow dust or moisture to enter.
2. Housing and Structural Components
Material and Craftsmanship:
Verify that the housing material matches the product specifications. The surface should be smooth and free of casting defects such as blowholes, cracks, or porosity. Welds must be even, secure, and free from undercutting or incomplete fusion. Stainless steel housings must also be inspected for signs of corrosion.
Connection Interfaces:
Threaded connections should have complete, undamaged threads with no signs of stripping. Flange sealing surfaces must be flat and free from scratches or dents to ensure proper sealing. For quick connectors or bayonet fittings, test for smooth operation and secure locking.
Protective Coating (if applicable):
Inspect for uniformity of any anti-corrosive or protective coatings. Look for peeling, bubbling, or flaking. Coating thickness should meet specified standards to ensure environmental resistance.
3. Sensing Element and Internal Mechanisms
Probe Condition:
The sensing stem should be straight and free from dents, bends, or surface scratches. For thermometers used in corrosive environments, carefully check for signs of pitting or material degradation on the probe surface.
Internal Transmission Components:
For detachable or openable thermometer models, examine the internal gear and linkage mechanisms (if accessible). These should be complete, firmly connected, and free from deformation. Transmission should be smooth without any sticking or resistance.

4. Nameplate and Product Identification
Markings and Labeling:
Ensure that the thermometer’s body or dial clearly indicates key information such as brand, model number, measurement range, and accuracy class. These should match the certificate of conformity and instruction manual. The nameplate must be securely attached and legible.
Assembly Alignment:
The thermometer should be well-assembled, with no loose parts or rattling. The dial head and probe must be properly aligned—without tilting or angular misalignment.
5. Inspection Tools and Documentation
Tools Assistance:
Use tools such as magnifiers to check fine details, and calipers to verify critical dimensions like thread diameter or probe thickness. This helps identify deviations from standard tolerances.
Inspection Records:
Document each inspection item in detail. Mark any anomalies or defects clearly. Maintain a record archive for quality traceability, future reference, or maintenance planning.

✔ Summary
A complete and detailed visual inspection of a bimetallic thermometer helps detect defects caused during manufacturing, handling, or storage. Ensuring the device is in optimal physical condition lays the foundation for accurate and stable temperature measurement.