When integrating a load cell into your weighing system, one of the most overlooked—but critical—decisions is choosing the correct wiring configuration.
You may encounter 2-wire, 3-wire, or 4-wire load cells in specifications or datasheets. So… what’s the difference, and why does it matter?
This article explains each wiring type, its pros and cons, and which one is best for your application.
1. Basic Concepts: What Do Load Cell Wires Do?
Typical strain gauge load cells include these types of wires:
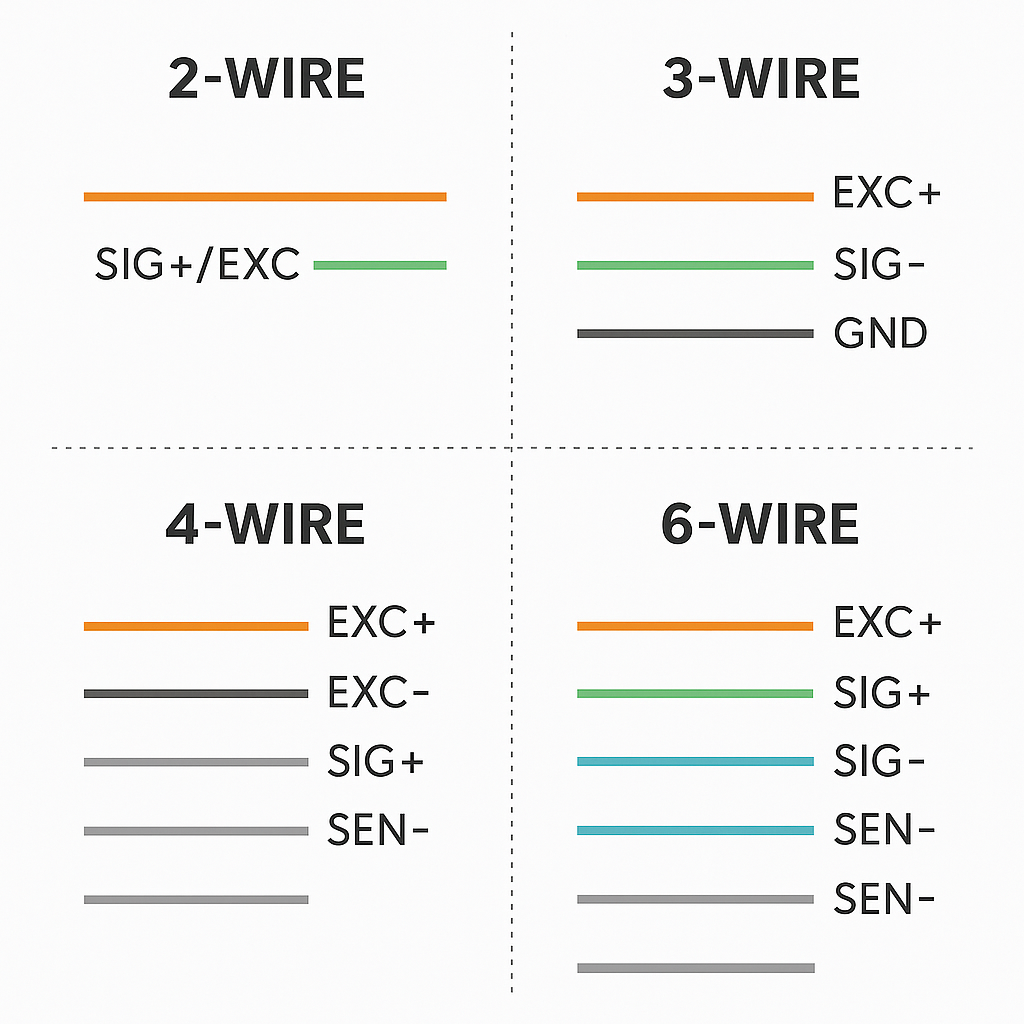
Excitation+ / Excitation- (EX+ / EX−): Power supply to the bridge circuit
Signal+ / Signal- (SIG+ / SIG−): Voltage output proportional to load
Sense+ / Sense- (SEN+ / SEN−)(for 6-wire): Feedback to compensate voltage drops
Ground / Shield (optional): EMI shielding
The wiring configuration affects accuracy, stability, and ease of installation.
2. 2-Wire Load Cells
⚙️ Signal and excitation share the same wires
🟢 Pros:
Simplest wiring
Cost-effective
Often used in 4–20 mA current loop output sensors
🔴 Cons:
No separation of signal and power → susceptible to noise
Limited to current-output systems (not standard strain gauge types)
Not used for precision applications
🧩 Use Case:
Rugged industrial sensors where simplicity is more important than high accuracy.
3. 3-Wire Load Cells
⚙️ One wire for excitation, one for signal, and one for ground
🟢 Pros:
Basic separation between power and signal
Suitable for low-cost weighing systems
Easier wiring than 4-wire
🔴 Cons:
No sense lines → voltage drops across long cables cause errors
Ground loop issues in some installations
Affected by temperature and wire resistance
🧩 Use Case:
Short cable runs or small bench-scale systems where ultra-high precision is not required.
4. 4-Wire Load Cells
⚙️ Separate wires for excitation and signal, but no feedback/sense wires
🟢 Pros:
Industry standard for most load cells
Good balance of simplicity and accuracy
Compatible with most commercial weighing indicators
Better immunity to noise than 2- or 3-wire setups
🔴 Cons:
Voltage drop across long cables can affect output
No built-in compensation for cable resistance like 6-wire models